Tuesday, September 23, 2025
Home Blog Page 3

Growing Mint Seeds

0

Mints are perennial herbs that are beautiful to the eyes.  They have a wonderful aroma and they grow in nearly every condition.Growing Mint seeds might be the easiest of herbs to grow.

Whether being used for gardening or landscaping, this herb is worth having around. The most common and popular types of mint are peppermint, spearmint, and apple mint.

Mints thrive near water sources and partial shade, but tolerate many different growing environments.

In this article we’ll look at the uses of mint, and tips on how to grow it properly.

Uses of Mint:

  • Medicinal and cosmetic
  • Insecticides
  • Room scent and aromatherapy
  • Culinary

use for mint

Medicinal and cosmetic

Medical uses include mint helping to treat stomach aches and chest pains, usually used in tea.

Mint is also used as an ingredient in ointments for insect bites and rashes. It is used in cough drops and in rubs, such as menthol, to help with the common cold.

Cosmetics and some perfumes use menthol, which is made from mint essential oil. Aromatherapy also is enhanced from the uses of this oil and menthol.

Insecticides and Room scent

Environmentally friendly insecticides are made from mint oil, which kills pests like wasps, ants, and cockroaches.

Mint is well liked for its pleasing aroma, where it’s used to enliven rooms and treat people’s stresses of life through aromatherapy.

Culinary and cooking

Many people love to use mints in their foods as well, in such items as jellies, syrups, candies, ice creams, and beverages.

The sweet flavor and cooling after-taste makes mint an appealing ingredient in our foods and drinks.

How to Grow Mint Seeds

Mint seeds can be grown indoors and then transplanted to the garden in the spring. Mint seeds are highly variable, so it can be hard to tell what variety they are, and some species are sterile.

The most effective way to plant mint is to take the plant cuttings from the runners of the healthy mint plants.

Optimally, mint needs a well-drained moist location with partial shade. Planting them in elevated garden beds, buckets, and other enclosed containers is necessary, because they have crawling roots that can be invasive to other plants in the garden.

Dig a hole and place a bottomless bucket in it, then plant the mint in it, this will keep the roots from killing other plants.

Seedlings need to be placed about one foot apart and watered occasionally until the plant is thriving.

After this, only water if going through an extended drought. If the soil is rich and dug up well, the mint doesn’t need fertilization.

Growing mint seeds in garden pots and other containers above ground work fine, and it also adds the benefit of being able to move the mint indoors during the frost and enjoy it year round.

Growing and Harvesting Mint

With some clippers, remove the leaves from the top of the plant, which will encourage growth.

This is best done when the spikes are in full bloom, to get the maximum flavor from the mint.

Never remove all the leaves at once. Mint leaves when grown outside can be harvested usually six months out of the year, and when inside all year round.

Fresh mint is best used right away, it can stored for a couple days in a fridge, put in the freezer, or dried and stored in an air-tight container in a cool, dark, dry area.

Mint is an herb nearly all of us are familiar with, and is a great addition to our gardens and homes.

There are many helpful uses for the leaves, including being aesthetically pleasing to our landscape.

Mint is so easy to grow and maintain and has so many uses.  Any home gardeners would benefit from adding it to their plots.

5 Grilling Ideas For Firing Up The Grill

0
Grilling ideas

Barbequing can get a little boring sometimes. But it doesn’t have to be, below are 5 grilling ideas you can do to fire up the grill, next time your entertaining:

Prawns

Try to get either Australian Green King or Tiger Prawns either are great on the barbie. Make sure you De-vain them by splitting them down the back, leaving the heads and shells in place.

Skewer them three or four at a time. Then grill them briefly on a hot grill, and serve with a squeeze of lemon.

grilling prawns

Pork chops

All you do, is dissolve 3 tablespoons of brown sugar and 3 tablespoon salt in 1 cup of hot water.

Add 2 cups of cold water, 4 tablespoons bourbon 2 tablespoons olive oil, and spices. Pour over chop. Refrigerate for 4 hours.

Dry with paper towel, start cooking gently finish on high to make sure you get those grill marks.

Chicken

Butterfly our chicken, open out and press flat. Cover with a herb rub. and leave in the fridge for at least 4 hours.

Cook over indirect heat until a digital thermometer in the thickest part of the thigh reads 80oC. Rest in foil for 15 minutes then eat.

Leg Of Lamb

Ask you local butcher to butterfly and open a leg of lamb. Coast in olive oil, herbs, minced garlic and black pepper. Cover and leave in the fridge overnight.

Cook over indirect hear for 15 – 20 minutes a side. Make sure you rest then slice against the grain. Then serve.

Corn

Make sure you buy corn in the husk, drop in a bucket of water for an hour, before cooking. Place dripping wet on the grill.

Close the lid, turn a few times until evenly charred, about 20 minutes. Roll back husks, service with a mix of melted butter, lime and juice, and cayenne pepper.

Planning for your next BBQ

Most people don’t realize the meat will continue to cook once its removed from the grill.

So when you take your meats of it, make sure you do so just before, you think there done, then let them rest.

This will make sure you have the perfect meat, cooked to perfection.

Ultimate Guide to the Best Rabbit Repellent For Your Garden

0
best rabbit repellent

Rabbits are cute fluffy animals, and they can make great pets. However, when they find their way into your garden or yard, they can cause a lot of harm and wreak havoc to your plants and garden.  You can get the best rabbit repellent for your garden to fix the problem.

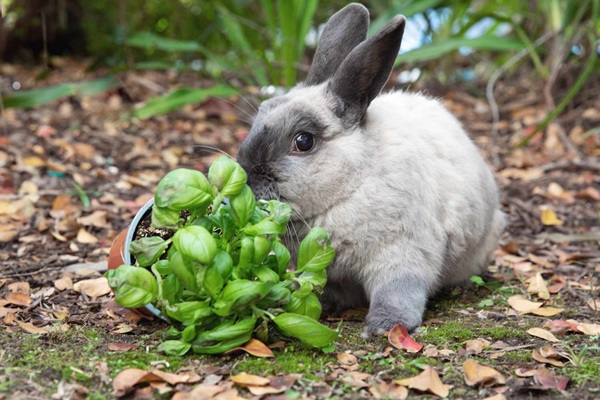
During spring, rabbits eat the tender growth of all the emerging pants in the garden. They feed on the broad-leafed weeds, grass, roots, shoots, fruits, clover, vegetables, and berries during summer.

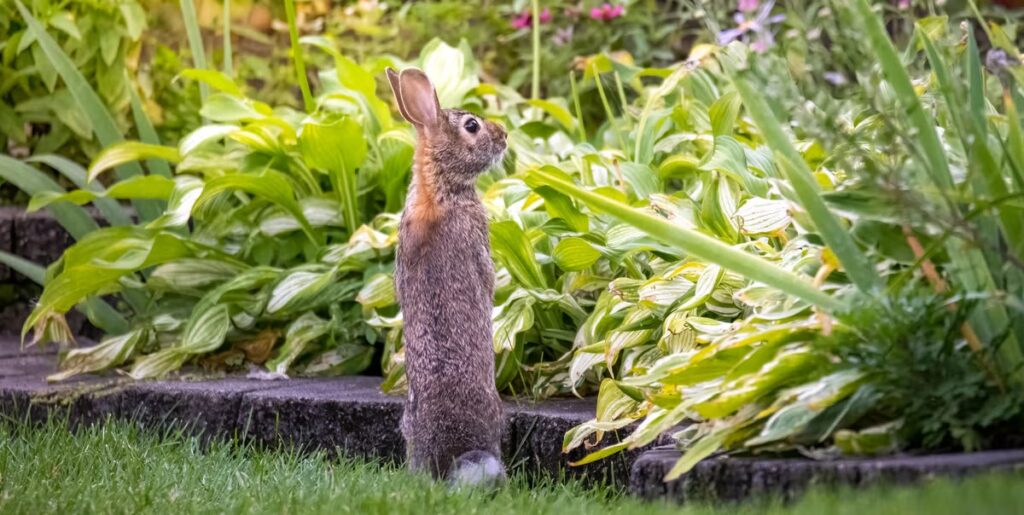
They eat tree barks, buds, twigs, shrubs, and raspberry plus blackberry bushes in winter. One of the main ways you can recognize that you have rabbits in your backyard is to see them running around.

Another common sign of rabbit infestation is the mark of their teeth on your plants. Rabbits have sharp teeth, which make the plants they chew on have clean cuts. You can also spot rabbit droppings around the garden.

rabbits in the gardenIf you are looking for the best way to repel rabbits from your garden without killing them, here are some of the best rabbit repellent you should try:

rabbit repellent

Enviro Pro Rabbit Scram Repellent

This granular repellant is considered the best rabbit deterrent, and it works wonders in repelling not only rabbits but also other rodents intending to eat off your plants.

It is the best rabbit deterrent because it is easy to use as you just sprinkle it on the ground without mixing, deluding, or measuring.

Also, you can sprinkle it on your garden under any conditions. The repellent will remain effective on the ground for several months, even under extremely wet conditions.

However, when there are extended periods of extreme sunlight, you should apply it to your garden more frequently.

Once you open the package of the repellent, the initial smell will be very pungent, but with time, it will become mild enough for you not to even notice it.

However, the smell that remains is enough to send the rabbits and any other rodents away from the garden.

If you have children or pets in your home, you do not have to worry as the Enviro Pro Rabbit Scram Repellent is not harmful to either humans or animals.

Pros

• Cheap, especially if you buy it in large amounts

• Long-lasting, and will only need you to reapply once monthly

• The strong initial smell does not stay long enough to bother humans

• Does not harm you or your pets

• Ready to apply straight out of the packaging

• It is water-resistant and will remain effective even in extreme wet conditions

• After some time, the repellent breaks down into nitrogen nutrients beneficial for the soil

Cons

• You cannot apply the granules directly to your plants

• Does not cover large lands

Get rid of rabbits in the garden

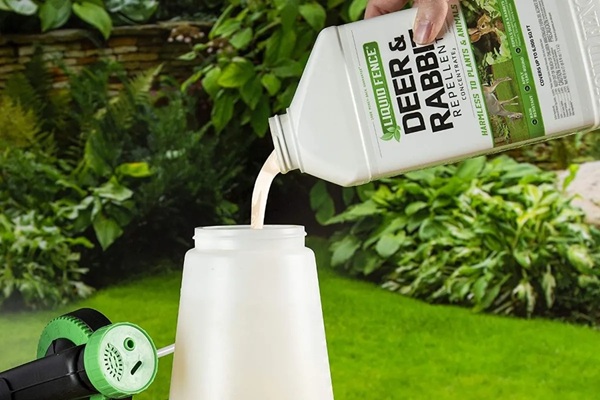
Liquid Fence Deer and Rabbit Repellent

This liquid repellent is a powerful one, guaranteed to keep off not only rabbits but also deer from your garden.

What makes it the best rabbit repellent is that it does not harm your plants, meaning that you can spray it directly onto the vegetation.

That makes it the best rabbit repellent for large flower beds, garden spaces, trees, shrubs, vines, and ornamental plants.

One of the main things that make it the best repellent for gardens is that the rabbits and deer do not have to eat the plants on which you spray the repellent.

Another thing that makes it the best rabbit repellent is that the overpowering smell of the repellent is enough to keep those unwanted animals away.

The repellent starts to work after you spray it; it is long-lasting and water-resistant, meaning that it will be effective even under heavy rains.

Since the solution is very concentrated, you should mix it with water following the given directions. You can also apply it throughout the year.

Pros

• It is a perfect repellent for decorative and big flower gardens

• It is long-lasting and does well in all weather conditions

• It is affordable and strong

• Easy to apply because you only need to spray

• You do not have to rotate it with other repellents around the year

• It is safe for both humans and animals

Cons

• It is not a perfect choice for fruit and vegetable gardens

deer and rabbit repellent

Nature’s Mace Deer & Rabbit Repellent

This liquid repellent is yet another one regarded as the best rabbit repellent in the market. It is also a powerful concentrate because you can make 5 gallons of repellent spray from just one 40-ounce bottle.

One thing that makes it the best rabbit repellent is that you can use it all year round, and because it has natural ingredients, it is harmless to both humans and animals.

The spray is weather-resistant, long-lasting, and odorless for humans once it dries up.

Its all-natural ingredients are what make it the best rabbit repellent for gardens because it is both bio-degradable and non-toxic.

According to the manufacturers, this repellent has thrice the amount of rabbit repelling ingredients other ingredients have, making it the best rabbit repellent.

Another factor that makes this repellent the best rabbit repellent is that it depends on both taste and scent to repel rabbits.

The repellent spray is also long-lasting and weather-resistant, meaning that you can use it during all seasons. It will not also wash away if you irrigate your plants.

Pros

• It is affordable even though you are on a tight budget

• It is safe for humans and animals and does not harm your soil either

• Its strong smell disappears after it dries but remains strong enough to deter the rabbits

• More effective because it relies on both smell and taste

• Not only does it repel rabbits, but also deer

Cons

• Since it repels deer too, it is not perfect for people who love seeing them

rabbitsPlantskydd Granular Animal Repellent

This granular repellent is a safe, natural, and strong repellent that is safe for both humans and animals.

Manufacturers make this repellent from 100% natural ingredients like dried blood, meaning that it does not harm the plants or the soil.

That makes many gardeners regard it as the best rabbit repellent. Another thing that makes people consider it the best rabbit repellent for gardens is that it repels other animals like deer, hares, squirrels, chipmunks, voles, and elk.

It is also a powerful repellent because a 3.5 pounds container of the repellent is enough to cover around 1800 square feet of land, making many people rank it the best rabbit repellent.

The repellent is a great option for protecting big vegetable or flower gardens that have low-lying plants.

During the active growing season, you need to reapply after around 6-weeks, while in the dormant season, apply at the beginning and before snowfall.

The repellent remains effective throughout the whole time before reapplying even though it rains or snows.

While it is safe to use on vegetables and fruit gardens, you should be careful not to spray the repellent on the fruits and vegetable produce.

Pros

• Affordable

• Non-toxic and bio-degradable because it is 100% natural

• Does not harm your plants, the soil, humans, animals, or pollinators

• It lasts for up to 8 weeks before you have to reapply

• Water and snow-resistant

Cons

• This repellent is the best rabbit repellent for gardens that only have low-lying plants, with a maximum of 2 feet tall.

• May repel other animals apart from rabbits that you don’t want to get rid of

hunting rabbits

I Must Garden Rabbit Repellent

This is yet another natural repellent that ranks among the best rabbit deterrent.

Its natural formula not only makes people consider it the best rabbit repellent for gardens, but it also makes it safe for you, your pets, and the soil.

Unlike other repellents, some factors make I Must Garden Rabbit Repellent the best rabbit deterrent.

First, it is specifically made to repel rabbits, which makes you not worry about chasing other animals you want around.

That is because it uses natural smells that keep rabbits from chewing on your plants. It also does not have any smells that you have to deal with, even when you open the packaging.

That is because it uses mint oil to repel the rabbits, which is not pungent for humans.

 Another reason why this is the best rabbit repellent is that it is also water-resistant and long-lasting, which means that you do not have to reapply it after it rains or after you irrigate your plants.

You can also apply the repellent directly to your plants and flowers without harming them.

Once you apply the repellent, you only need to reapply after four weeks. It is a perfect solution if you are looking to keeping your gardening practices environmentally friendly.

 Pros

• Tested and approved by many gardeners around the world

• It is ready for use from the package without measuring and mixing

• It is all-natural, meaning that it does not harm you, your plants, pets, and pollinators

• It does not have any pungent smell

• Affordable

Cons

• It may not be as strong as other rabbit repellents

liquid fence deer & rabbit

Liquid Fence 112 1 Quart Ready-To-Use

This is the best rabbit repellent if you do not like mixing your strong-smelling rabbit repellent.

Many gardeners rank it as the best rabbit repellent for gardens because it also contains 100% natural ingredients.

This liquid fence rabbit repellent is long-lasting and rain resistant and also repels not only rabbits but also deer.

You can also apply this repellent during any season of the year and still get the best results.

Another factor that makes people consider it the best rabbit repellent for gardens is that you can use it on edible plants, and it will not affect their taste or harm you if you consume them.

Since it is all-natural, it is safe for the environment, you, your pets, and any pollinators.

It is also the best rabbit deterrent because it has a “just spray” application which makes it easy to apply on individual plants or bushes.

It also does not have any smell even before it dries up.

Pros

• Easy to apply

• .Safe for the environment, animals, and you

• Long-lasting and water-resistant

• Affordable

• You can use it on ornamental gardens, trees, shrubs, and vines

• Is bio-degradable and does not have any smells

Cons

• You cannot use the spray bottles on large pieces of land

• It takes a lot of time to decant in other containers

Repellex Deer and Rabbit Repellent

The Repellex Deer and Rabbit Repellent are other repellent people consider as the best rabbit deterrent.

People see it as the best rabbit repellent for gardens because the formula sticks to the surfaces of your plants, offering the best results for up to 90 days.

This repellent includes natural ingredients like garlic oils, dried blood, and hot pepper.

Therefore, it uses both smell and taste to deter the rabbits, which is one of the best way to repel rabbits.

It comes as a ready-to-use solution, and you can use one gallon on around 120-160 plants.

Pros

• Easy to apply

• Affordable

• Does not harm you, your pets, pollinators, or the soil

• You can apply directly to the plants

Cons

• The red coloring could discolor light-colored plants

• Has a strong smell upon opening the packaging

• Rabbits could become resistant to the smell of dried blood

• It might affect the taste of the plant

i must garden rabbit repelle

Other Best Way To Repel Rabbits

Apart from using some of those best rabbit repellent and best rabbit deterrent, there are some other tricks you can use to repel rabbits from your garden.

Plant undesirable plants

The best rabbit repellent uses smell to repel the rabbits, and others use both smell and taste.

Therefore, planting plants that have undesirable smells and tastes for rabbits is one of the best way to repel rabbits. Some plants include garlic, onions, lantanas, alyssum, and sunflower.
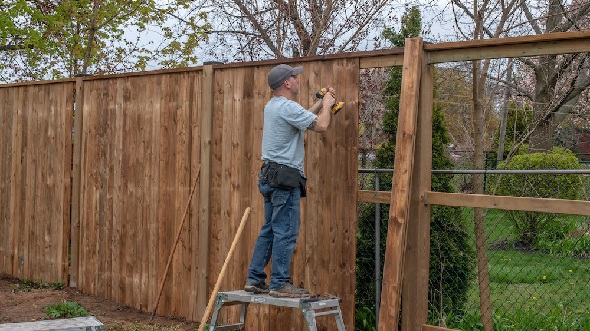
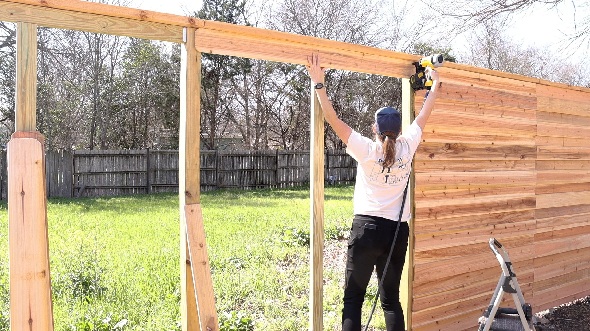
Put up barriers

This is another best way to repel rabbits and almost the most effective one. Erect barriers around your garden that have small spaces where rabbits can’t fit.

You can use chicken wire that is around 2 feet tall and bury it 6-12 inches deep.

Have a dog

Having a dog is not only the best way to repel rabbits, but it also helps repel other animals and birds.

Trap and relocate

If you only notice that you have one or two of the rodents in your garden, trapping and relocating them to a safe place is the best way to repel rabbits.

Use scare devices

In addition to using the best rabbit repellent, you can buy some fake animals like snakes and put them all around the garden.

Ensure to change them up regularly and reposition them.

Tidy and clean your garden

Rabbits love to hide in wooded areas or areas with cluttered waste to hide from danger. Therefore, remove all the debris and wood waste from your garden.

How To Get Started With Gardening

0
growing gardens

If you are trying to get started with gardening. If you’re interested in planting your own garden, it may be best to start with small plants like herbs.

You can use garden containers and keep them in your kitchen to monitor the growth of your plants.

There are also several methods for growing vegetables indoors that you can try if you’re new to gardening. Here are a few tips to help make your garden a success.

gardening

Choose Your Herbs

Think about the herbs you cook with most often and buy the seeds that you need to start your herb garden.

For instance, mint seeds grow very well indoors, and if you use mint often for your tea or certain desserts

This plant should be included in the elevated garden beds you use to create your windowsill garden.

Oregano, thyme, and rosemary are also easy to grow indoors. The seeds will fit neatly into small garden containers,

If you tend to them correctly, you’ll have a flourishing little garden in no time.

Talk to a Garden Specialist

While you can grow the vegetables and herbs of your choice from seed.  It may be best to get a starter plant and nurture it if you’re a new gardener.

When you go to purchase your starter plant, or even if you want to try your hand at growing seeds.  Talk to a garden specialist who can tell you which soil is suitable for fresh herbs and which garden containers will give your plants a suitable amount of room to grow.

When you’re growing food indoors, diseases from the soil can be one of the main reasons your crop fails. The soil mix you choose should be light and drain well.

In most cases, you’ll need to put potting soil at the bottom of the container and top this with potting mix after you’ve put the seeds or plants in the container.

Most herbs need a considerable amount of water as well, so ask a gardening professional how often you should water your plants to keep them green and healthy.

growing gardens

Give Your Plants Some Sun

When you’re growing herbs, you’ll need to expose them to direct sunlight for at least five hours each day.

Place the garden containers on a windowsill that will expose them to as much sunlight as possible.

Many of the herbs that are easy to grow indoors are native to the Mediterranean, which means they thrive in warm weather.

It’s also best to keep your home between 65 and 70 degrees while your edible plants are growing.

Vegetable crops like peppers and tomatoes also need a considerable amount of sunlight to thrive, so be sure to place these by the window as well.

If you live in an area that doesn’t receive much sunlight, or if you’re starting your garden during the fall and winter months.  You can purchase lights from your local garden supply store.

The lights will mimic the light of the sun and keep your crops from wilting or underdeveloping.

Get started with gardening

As a new gardener, it may be helpful to take pictures of your plants at each stage of the growing process.

This will help you determine if you need to add more steps to your plant care regimen.  Also gives you an idea of how long it takes for certain plants to grow.

That’s how easy it is to get started with gardening.  Start and just add to it as you go.

Light Up Your Backyard

0
light up your backyard

If you want to light up your backyard.  There are some really simple and effective ways you can do that.

Why do you need lights in the backyard?

Well, safety is the main issue, as you don’t want you or a loved one stumbling around in the dark.

Mood lighting would give your backyard a romantic atmosphere.

installing garden lights

What lights to use?

The next thing you need to consider is whether you want to go Solar or have low-voltage live wiring.

A well-designed outdoor space takes into account your guests’ lack of familiarity with it. You may be able to walk around the yard blindfolded, but your guests can’t.

Path lighting

It should be the first thing to consider. Particularly if you have steps descending to the back.

Always put lights at the bottom of the stairs so that people know there are no more steps to tread.

If you have a designated path meandering through the backyard.

Then consider sights on either side of the path so that there are no shadows to contend with.

Feature lighting

If you have a particular statue or special tree in the backyard yard then think about putting up lightning.

This form of lightning uses low-voltage bulbs to illuminate a tree or other features from the ground up to highlight the object that is being lit.

Mood lighting

The opposite of up lighting is mood lighting.

This is where the lights are placed high up in a tree or structure and focused downwards.

This is also an excellent way to light up your patio, with multiple lights casting the shadows from the leaves of the trees, making interesting patterns.

Spotlight a fountain or water feature as an alternative lightning method.

Swimming pools are able to be lit underwater and it is essential to have plenty of lights surrounding the swimming pool, not only for safety but for its aesthetic look.

backyard lights

The power of the sun

Installing solar lights for your lighting is a smart, inexpensive idea, as the sun will power them for you.

Some of them have a switch on them that enables you to turn them off completely if necessary.

They have an internal sensor that tells them when to charge their batteries and turn off the LED bulb.

Most lights have a 4-5 hour charge time and about a 6-9 hour working time. On cloudy days, the light will still receive a charge.

The clouds diffuse the strength of the sun, but solar irradiance is still transmitted from the sun to Earth.

What size and shape of light?

There are a multitude of shapes and sizes in solar lights. You can even purchase lights in the shape of flowers, which might save you from having to make a flower garden.  These are the most environmentally friendly ways to light up your backyard.

There are solar lights that are motion-driven, and with a security system as an added safety measure, it’s bound to detect intruders in the yard.

Now that you have the backyard sorted with lightning, why not consider some nice lighting for the patio?

How bright is too bright?

When it comes to lightning, ambient lights for the patio may be the way to go.

Consider a string of lights zigzagging over the entertainment area that will give a nice, soft overall light.

The key to lighting the outdoor entertainment area is not to overdo it but to have enough light so that it is a safe area.

For everyone. If you want to make an impression on your guests, think about installing a chandelier.

If you don’t wish to be that ostentatious, when you light up your backyard.  Then an elegant pendant light will enhance the patio.

Patio Landscaping –Ensuring Your Backyard Stands Out

0
Patio Landscaping

We all deserve to live in a quiet and serene environment. That helps us achieve the best life has to offer. One of the most popular and effective ways of creative a conducive environment is through patio landscaping.

What patio landscaping really means

This entails creating an elegant, healthy, and well-kept landscape. There are several ways of achieving the desired backyard effect.

However, if you are looking forward to creating a new landscape, or upgrading the old patio, you will find the following pointers handy.

amazon outdoor patio furniture

Open minded design

One of the cardinal rules of landscaping the patio is having a comprehensive plan.

The plan should list every little detail of what you want to achieve. It should also have the specific design you want.

By doing some prior planning.  It ensures that your desires are fulfilled. It also saves on cost as well as time.

Unfortunately, as human beings, we always change our minds rather easily. This season you may feel like planting flower plants.  While the next season you may want a tree canopy.

Having an open-mind helps an individual change your landscape to a more proffered one.

You can’t afford to be too rigid on a plan that has been recycled for years. A change is always ideal.

Being unique in the design

There is no questioning the fact that elegant backyards always have an alluring effect.  A standout garden will also offer more satisfaction.

Nevertheless, people will appreciate and talk more about a unique backyard design. A distinctive patio landscaping design will always remain in memories.

This may be achieved through several ways. For instance, you may decide to tryout exotic flowers instead of local flowers.

You may also consider a custom design that has never been tried before.

Make if a focal point

A good terrace takes into consideration a number of factors. This will influence the final effect of the patio design.

Take the case of a person who loves antique or classic furniture. His focus will be more on the patio furniture than the deck itself.

A person, who loves the open field or nature, may most likely give more attention to the trees.

Add personality to your patio design

A beautiful and well-kept yard makes the owner proud. It also appeals to the visitors as well as other 4 legged occupants.

Still, at the end of the day, the yard owner is the one who wants the most satisfaction. When establishing or overhauling a patio, it is necessary to know more about yourself.

For instance, if you love your homemade meals and salads, you will probably add more vegetables and spice plants in the yard.

If you are the flower-loving person, then investing in a variety of flowers will add more personality to the patio.

outdoor patio furniture

How to find the right patio landscaping design

With so many designs to choose from, it can become quite a challenge to identify the most suitable style. Better technology and availability of information has led to a variety of options thanks to the internet.

By simply searching online, a person is able to find so many different styles. However, when trying to come up with the best patio, effort, patience, and passion is needed.

Engaging other patio owners, talking to family and friends, participating in social forums

As well as interacting with firms specializing in patio landscaping are some ways to get more insight.

Gardening On A Budget – 10 Tips On How You Can Save Money

0
gardening on a budget

If your gardening budget is tight.    Gardening on a budget doesn’t need to send you broke.

The following is 10 tips on how to get a great garden that won’t cost the earth.

10 Tips of Gardening on a Budget

Collect seeds – Cheaper then buying them

Nearly every plant that we grow produces fertile seeds, so if you want trees, shrubs or flowers collect the seeds.

After the plant flowers, seeds will form where the flowers were. It will take time for the seeds to ripen so be patient.

When ripe the seed pods may change colour and split open. Collect and store them until it is time to sow them next spring. (make sure you label the seeds).

Read about what I did with growing pumpkins.

Grow plants from seeds – Goes with collecting seeds

Whether you are growing plants from the seeds you collected or from bought packets of seeds, which normally only cost about $3.

As long as you are planting them at the right time they will germinate quickly. You can sow seeds directly to where you want them planted.

Or raise them in some seed raising mix and then transplant them out when they become seedlings.

Dig up and divide

My favorite thing to do in the backyard.   This is good for shrubs that form a spreading clump as the clumps have their own roots and can be replanted, or plants with lots of stems can be cut or pulled apart.

Ask your friends if they would give you some of theirs the next time they dig & divide. The best time to do this is in winter or earliest spring.

cheap garden ideas

Cuttings from friends

That doesn’t mean cut your friends. Cut their plants.  Using a sharp pair of secateurs you can remove the top 10cm from a stem which does not have any buds or flowers.

Insert into a seed raising mix, keep it moist and in about a month you should notice new growth on top. I suggest when you’re visiting friends have a pick through their garden.

Make your own mulch

Rake up fallen leaves and mower cuttings, you can put them directly onto your gardens or put the leaves through a mulcher for finer mulch.

To make leaf mold put raked leaves into a plastic bag wet the leaves seal the bag and leave it until next spring.

This will turn into leafy compost that you can spread straight onto your garden.

Cheap & freebies

Some councils will give at least one free plant to rate payers, contact your council to see if they do this.

Cheap plants can normally be found at school fetes, markets, garage sales, check your local college to see if they have a horticultural department that has cheap plants.

Make compost

Don’t throw any of your kitchen scraps in the rubbish bin, start your own compost. Compost is great for the garden.

You can even use tea leaves in the compost, newspapers, grease paper, cardboard, leaves, hair from you brush has nitrogen and is great for the compost, anything that breaks down (don’t put meat in the compost).

Use 2 bins, cut a hole in the bottom of the bins and place the material for composting inside the first bin until its full put the lid on.

Make sure you add water to help with the composting process. When the first bin is full start adding to the second bin.

It will take a few months to break down but it will be worth it to have beautiful composted soil for your garden.

Garden art

Old logs, driftwood and boulders can look great in a garden; their natural texture will look good amongst the greenery, maybe animal skulls if you like that type of thing.

Old wheelbarrows, old watering cans anything that you think will look great in your garden.

Good & Bad bugs

Grow native trees and shrubs in your garden they will attract the good bugs and help keep the bad bugs to a minimum.

If you have bad bugs, soapy water (detergent, soap flakes, etc) in a spray bottle sprayed directly onto the bugs will work well, spray about twice a week.

Snails and slugs are attracted to beer, so sink a container into the ground so it’s at ground level and put beer in the bottom the snails and slugs will be attracted to it and fall in and drown.

Gardening tools and odds and ends

Instead of paying a big price at the hardware store or nursery check out garage sales for gardening tools, gardening ornaments and pots, but go early to get the best bargains.

That it 10 really simple tips for gardening on a budget.  If you want some more garden ideas on a budget try this.

How to Dry a Muddy Yard: Simple Fixes for Backyard Drainage Problems

0
fixing a muddy yard

Unless you have a perfect flat yard with a full, lush lawn and great drainage.  There is a chance that after some rain, you might have a muddy yard.  It’s not the end of the world, we want to give you some great ideas for how to dry a muddy yard.

What causes a muddy yard?

The main cause of a muddy yard is usually really poor drainage.  It’s easy enough to identify the next time it rains, go outside, and take a look at where water is pooling in your yard. Also, where is the water coming out of the downspouts running to?

If water pools in your yard, the downspout water runoff is running back into your yard.  Then it is most likely going to cause a muddy area in your yard.

How to dry muddy yard

Fixing the Downspout runoff

Most roofs have gutters and downspouts for catching and directing water to either drainage or far enough away from your house to not cause a problem.

If you have identified downspouts as the problem, start by making sure that the end of the downspout is extended at least 6 feet away from your foundation.

If it’s not, it’s a really easy process to extend.  Most downspouts will be PVC plastic or a tin; take a trip to your local hardware store.

Buy a joiner and some downspout pipe lengths, and join them together, and extend the length.

That way, you can direct the downspout toward a ditch, a pond, a garden, or another lower-lying area outside the lawn.

Just make sure that the drainage area is clear of debris or vegetation so the runoff is not impeded in any way.

Fixing an uneven yard

If it’s simply water pooling after rain that is causing a muddy yard, then it’s the slope of your yard that is the problem.

It’s as simple as a lawn that’s level or slightly lower in the middle is going to collect water.

To give water the chance to run off away from your house and yard, you need a lawn that slopes at a 2 percent rate away from your house.

That way, gravity makes rainwater flow away from your house in whatever direction it’s sloping.

To fix the grade issue, you need to regrade your lawn.  You have a couple of options here: getting more topsail bought in and spread properly.

Or taking topsoil from the bottom of your yard to the top side.

playing in a muddy yard

Lawn maintenance to dry a muddy yard

Sometimes it’s the soil not able to absorb water.  This is generally due to lawn thatching.  Lawn thatching is a layer of dead grass, root sand debris that forms between the grass and the soil surface.

This is where a garden tiller is really handy for aerating your lawn.  By doing it once a year, a garden tiller will dig small holes into the ground to loosen compacted soil.

It lets the air in to the root system as well as drainage for water.  We’d recommend tilling the soil to at least 6 inches.

Fertilizer and organics

If you have gone to the trouble of retiling your lawn, make sure you add fertilizer and spread fresh lawn seeds onto it.

You want to get the most out of the tilling as well as give your lawn the added boost of fertilising.

Adding more drainage

Where you can add topsoil, or aerate your lawn, then installing a fringe drain in a trench may be the next best thing.

A trench is simple.  Grab a shovel and start to dig a trench the length of where you want to drain water from, and in the direction of where you want to drain it to.

With a trench, if you want it to be permanent, then think about lining it.

Simple concrete with a grate works pretty well.

A French drain is a trench lined with landscape fabric, something like a perforated drain pipe.  Then filled in partially with gravel and covered with soil and reseeded.

French drains are perfect in most yards, and the location is usually undetectable after plants grow.

Getting in a professional to dry a muddy yard

If you are still stuck with how to dry up a muddy yard, then maybe its time to get in a professional landscaper.

Professional landscapers have the tools and experience to fix any yard issue you might be facing.

They can do the big jobs like removing the grass and regrading and reseeding or relaying another lawn.

Adding hard landscaping

Sometimes, no matter what you do, you will not escape muddy spots in your yard.  You can add a new hardscaping feature to your yard.

Depending on where the muddy area is, you can build a hard material path between the two areas.   A concrete or concrete boardwalk will keep your feet dry.

If you have a muddy area beside your house, think about adding a patio to it.  Even a gazebo or paved lounge area.

draining a muddy yard

Pets in your yard

Even if you have a yard with perfect drainage and a well-aerated lawn.  It’s pointless if the family pet is out there digging holes.

Hardscaping is usually the best answer to a dog that loves to dig in one area.

You can pave around the area, then surround it with large touch-salt-tolerant plants.

Create a feature garden

If you’ve tried the above, and are still struggling, then maybe it’s time to consider embracing the wet area.  You can create a water garden feature in your yard.

It’s a practical solution to deal with a muddy yard.  You can convert the area into a water garden full of water-tolerant plants.

Any downspout water runoff can be directed into the water garden.

Just make sure that the area you are going to convert is at least 10 feet away from your house.

When we were young, it was fun to get out there and play in the mud.

As we get older and want to enjoy living out back, it’s not fun looking and walking in the mud.  With a little bit of effort and imagination, you can dry a muddy and pretty easily.

How to dry a muddy yard might be a combination of a few different the, but whether it’s soil amendments and regrading your yard.

Adding additional landscaping or creating a feature water garden, then you can have a mud-free yard within in week

How To Landscape Around Trees

0
how to landscape around trees

Doing some nice landscaping around trees has numerous advantages, such as hiding tree roots and creating a garden focal point. Knowing how to landscape around trees is, therefore, a must for homeowners who want to enhance their yards.

Here are some landscaping ideas that will help ensure your specimens (and the rest of your lawn) stand out.

How to select plants

Just because the area underneath your tree is shady does not mean you cannot add a few plants.

Accordingly, another part of learning how to landscape around trees involves choosing plants. Be sure any plants you choose have the following qualities:

  • Shade tolerance. Look for ones designated for full or partial shade.
  • Shallow roots. You won’t want to dig too deeply around trees as doing so could disturb their own roots.
  • Reasonable watering requirements. Any specimens you plant must compete with the tree’s larger root system for water. That doesn’t mean your plants must be drought-hardy. Rather, it means you should avoid ones that might require watering on a daily basis.

Landscaping plant choices

If you are just discovering how to landscape around trees, you may be wondering what specific plants are good choices. Here are a few you may wish to consider:

  • Carolina allspice
  • Japanese painted fern
  • Black snakeroot
  • Foxglove
  • Yucca
  • Golden scepter hosta
  • Guacamole hosta

Spring Bulbs

If you are wondering how to landscape around trees (and also enjoy spring flowers), you may want to consider bulb flowers such as tulip or daffodil.

Although these specimens do require full sun, they also bloom in spring before trees have fully sprouted their leaves. As such, they are ideal for planting under deciduous trees.

Are you interested in knowing how to landscape around trees using spring bulbs? It’s actually very easy, as all you need to do is place a few bulbs in the ground in the fall.

Come spring, you will see an amazing display of color that will return year after year.

Try the correct planting methods

Now that you know which plants to use, the next step in knowing how to landscape around trees involves placing them correctly.

First, determine the arrangement of your plants while they are still in their containers.

For the best possible visual effect, place taller plants in the back and shorter ones in front. Remember to leave enough room in between plants for each one to expand.

Once you have the arrangement you desire, take a picture so that you can then plant your specimens accordingly.

Begin near the base of your tree, digging only as deep as needed to cover the roots. Place each plant securely in the ground and tamp the dirt down around its base. Do not add any more dirt than necessary because doing so may suffocate your plant.

Continue until all of your plants have been placed, and then water lightly. Now you are ready to add mulch around your trees and plants.

landscape around trees

Choose the right Mulch

When learning how to landscape around trees, an important step involves choosing the right mulch. Ideally, you’ll want an organic material such as tree bark, shredded wood, or pine straw.

Avoid artificial materials such as shredded rubber or plastic, as these can contain harmful chemicals that may leach into your soil.

Even so, gravel or landscaping rocks can be an effective form of mulch because they are attractive and also provide adequate weed control.

Adding mulch correctly

A common mistake that many people make involves adding too much mulch. So that you do not overdo it, keep the following things in mind:

  • Never cover the base of your tree with mulch. Leave a four to six-inch ring in the center of your mulch to allow your trunk to breathe.
  • Cover an area that is between one-half and one-third the diameter of your tree.
  • Place two to three inches of mulch in the area. Gently fan the matter out so that the layer gradually gets thinner as it reaches the outer edge.
  • Add more mulch once or twice a year as needed to maintain the desired thickness.
  • Avoid covering plants or their base with mulch. As with your trees, leave a small around around the center free of mulch to allow for good airflow.

Adding and choosing a border

Now that you have the right plants and mulch, there is one more step in learning how to mulch around trees.

That step involves choosing and placing a border. The right border will help add curb appeal; however, it is a great backyard landscaping idea as well.

Not only does it add visual interest, but it also gives your plants their own defined space to grow in.

When it comes to a border, you have a nearly endless selection of materials to choose from:

  • Rocks or boulders
  • Bricks
  • Stone pavers
  • Cedar or wood fencing
  • Concrete
  • Plastic or vinyl fence
  • Plastic edging

One thing you will find when you are learning how to mulch around trees is that no one particular border is right for everyone.

Instead, you should choose one that most closely matches your home’s exterior as well as any other hardscaping.

Use your imagination to come up with new and creative landscaping ideas to find the border that is just right for you.

landscaping trees backyard

Installing a landscape border

If you are wondering how to landscape around trees, you may also be curious about installing a border.

The type you choose will largely determine how it is installed; however, any of them are easy DIY projects.

Some types, such as plastic or wooden fencing, have metal stakes that allow you to simply stick them into the ground.

Others, like concrete or stone pavers, are installed by placing them in the desired pattern and then overlapping blocks on subsequent rows.

Plastic edging is often used when you desire a more open look or would like to make mowing a little easier.

This type requires digging a tiny trench and then gently placing the edging inside it. You can then place a bit of mulch over top of it or leave the very top edge of it exposed.

Knowing how to landscape around trees is Easy

Discovering how to landscape around trees is not all that difficult when you keep the above things in mind.

Use your own backyard landscaping ideas to come up with a look that perfectly complements your own personality and accents your trees.

Your efforts will provide you with very pleasing results for years to come.

How To Build Your Own Fence

0
best way to build a fence

Anyone with a backyard loves a bit of privacy or wants to keep things confined in the yard.  Usually, that’s why people erect a fence.  With so many types of fences and ways you can go about building a fence.  We wanted to take a deep dive into what’s the best way to build your own fence.

Learn the best way to build your own fence

Whether you live in a residential house with a backyard or a larger acreage block, you will need fencing.

You will either want privacy from your neighbours or you will want to keep things confined in the space that you erect a fence.

There are several things you really need to consider before even starting to build a fence.

What area are you fencing?

You know better than we do.  What’s the area that you want to fence?  Living in a residential block with a backyard is very different from fencing an acreage property.

The first step is looking at the actual area you are fencing.  You need to work out how big the area is.

The easiest way to work out what the area is is to measure it.  If you have a tape measure, go get it out and run a tape measure out of it. If you have a large area, you can also use something like a laser pointer.

build your own fence

What type of fence do you need?

Residential fencing is so different from acreage fencing.

Residential fencing

Most people want residential fences to serve the purpose of privacy.  So, height and material of the fence are usually the two things that need consideration. A 6ft Colourbond fence is very different from a 4ft wire or mesh fence.

Does it fit into the aesthetics of the neighbourhood and your actual house?

Acreage fencing

Looks certainly don’t matter as much as functionality.  Fencing a long driveway or paddock can be done with rough-looking timber lengths.  6 Ft Colourbond would look out of place.

  • Fencing needs
  • Is it privacy?
  • Keeping the dogs in
  • Block noise

Make sure you know what the fence’s function is.

Have you spoken to your neighbour?

If it is a boundary fence that you want to erect.  Talk to your neighbour, especially if it’s a small residential block.

It’s important to talk to your neighbour even if it’s an acreage boundary fence you are erecting.

In some cases, you can get your neighbour to share the costs of erecting the fence.

build your fence

Talk to the council

A quick trip to your local council or governing body will help make sure that you have covered off any regulations you might need to know about.

There is nothing worse than erecting a fence only to find that you need to take it down due to a council regulation.

What type of fence to build?

There are plenty of options here, from:

  • Wire mesh
  • Timber
  • Colourbond
  • Brick
  • Concrete

All have their advantages and disadvantages; some are easier to erect than others. Some will also offer a more maintenance-friendly option.

Subcontractor or DIY fencing

Always a fun area to consider.  Should you do it yourself or get a fencing contractor to erect your fence?

DIY fencing should always be a more cost-effective option.  But if you struggle finishing projects or struggle with using tools, then use a subcontractor.

Sub-contractor fencers will cost you more, but you are guaranteed to get a good job done.  Just make sure you do your research

Is it facing the right way?

Depending on the type of fence material you are using.  You want ot make sure the smooth side faces your neighbours.

You can mix your fence materials

You might have neighbours who want different fence types, or maybe you have a limited budget.  Don’t be scared to mix and match your boundary fences.

Internal fencing is not that big of an issue, do with what you want that best suits your needs.

neighbour fencing

 A living fence as a thing

Depending on any council or neighbourhood restrictions, you can always go for green shrubbery or a hedge as a fence option.

It can be a great way to provide privacy and give a great look to your house.  Keep in mind that it can be easy to get through a bush or shrub.

Living fences can also overgrow, so you might need to cut them back from time to time.

Budget for your fence

Depending on the materials you are using, you can expect to pay anywhere from $8 to $55 per linear foot. Height, length, and type of fence are all factors that will affect the fence cost.

Make sure you set your budget accordingly.

Know your property line

If you are unsure of what your property line is, you might need to consider getting a surveyor to make sure you get your fence line right.

There is nothing worse than having to knock down a fence you just put up.

Climate for the best fence

Climate actually has a lot to do with what type of fence you will need.  Climates that experience frost will need concrete anchors for fence posts.

Warmer climates might need to use vinyl, and colder climates you can use wood, bamboo, or metal fences.

Creating gates and openings

A little planning here is smart; you need to allow for fence opening.  If you are fencing off your yard, make sure you leave openings to get whatever you need to into the area you’ve fenced off.

You might want to be able to park a boat and trailer in your backyard, well, I make sure you leave a gate opening wide enough to get it in.

Pedestrian access is also important; leave gate access through your fence as well.

Get creative with fencing

Dress up your fence if you want to.  If it’s a nice flat surface, painting a nice mural on the fence would dress it up nicely.

You can plant a nice row of flowers against it as well.

The wash up

Make sure you build your own fence that suits you.  Fences can be costly and time-consuming to put up, so you don’t want to have to tear down your hard work.