Sunday, November 9, 2025
Home Blog Page 4

Best Place To Grow Pumpkins – Is In Your BackYard

0
Best way to grow pumpkin

The absolute best place to grow pumpkins is in your backyard. I had a unique experience growing pumpkins recently.

After moving into a new house that had no garden whatsoever, I decided to purchase some raised garden beds.

That was okay, but I needed to fill them with good soil before I could plant anything.

Unfortunately, I chose the wrong supplier to purchase the soil from; it was supposed to be good bedding soil with manure and sand already mixed into it.

How to choose the best place to grow pumpkins

Well, when it arrived, sure, it had manure in it, great clumps that hadn’t been broken down, and the sand content far exceeded the soil content.

I was very disappointed and let the supplier know.

To help try to improve the soil in the bed, I used to bury all my vegetable scraps in it.

Hoping that the worms would do their magic and improve the soil. I unknowingly had some Kent pumpkin seeds mixed in those vegetable scraps.

So after some time, up popped a pumpkin plant.

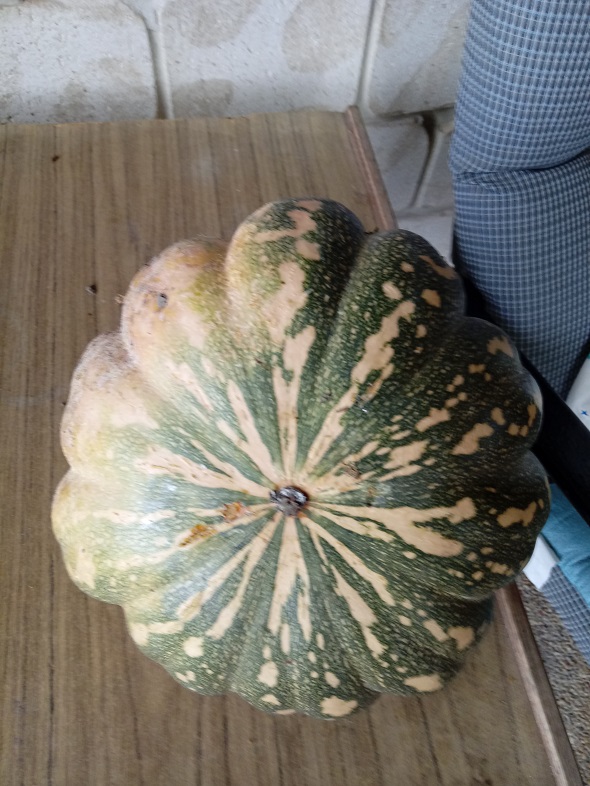
I was amazed at how quickly it grew and overflowed onto the lawn. Then I noticed a pumpkin growing, so I nurtured it along until it was time to pick it.

So we have been enjoying homegrown pumpkins.

How to Grow Pumpkins

What you need to know about pumpkins

Strangely enough, Pumpkins aren’t classed as a vegetable; they are a fruit.

It is rich in antioxidants, vitamins, and minerals. As well as such a versatile fruit that can be used from soup to desserts.  Being high in vitamin A and helps your body maintain healthy skin. It is low in carbohydrates, has no saturated fat or cholesterol.

Dried pumpkin seeds are a healthy snack for the health-conscious.

There are several varieties of pumpkins that are available. However, be aware that if you plant a pumpkin vine, it will take over a lot of area in your backyard.

Seeds can be purchased from any hardware store that sells gardening supplies or from a nursery.

Pumpkin varieties include:

  • Kent
  • Queensland Blue
  • Golden Nugget
  • Butternut

To name a few.  Sometimes you may have purchased from the supermarket or fruitier a pumpkin that has a really lovely flavour and you can use the seed from it to grow your own.

Tips for the best place to grow pumpkins

Planting schedule

Warm areas: Pumpkins can be grown all year round.

Temperate areas:  Make sure the frost season has passed before planting, as they don’t like really cold weather.

Cool to cold areas: After the winter frosts have finished.

Pro Tip:  Pumpkins love rich soil with plenty of compost.

Plant in a sunny, sheltered position.  Feed them with a good quality liquid feed about once a fortnight.

Do you have space to plant pumpkins?

If you have the space in your backyard to grow more than one vine.

Then loosen the soil and form it into small hills. Plant a few seeds, maybe up to six, spaced 3 to 4 inches apart.

Once they have sprouted up to around 5 to 6 inches in height, remove the weakest ones from the soil to allow the stronger plants to flourish.

As the vine will need room to spread. Mulch the plants with sugar cane mulch.

Watch for diseases and fertilize

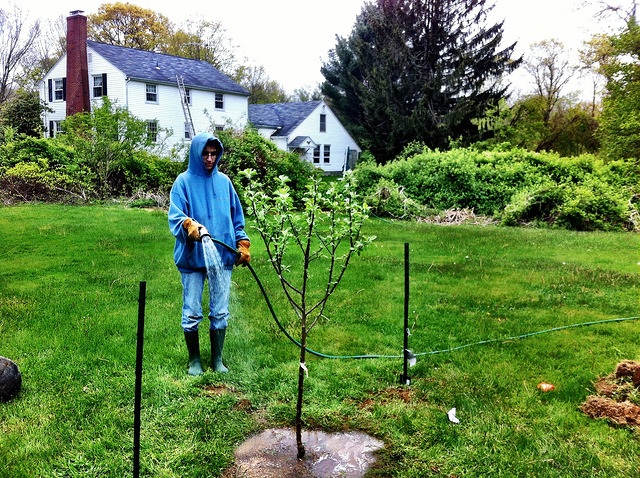
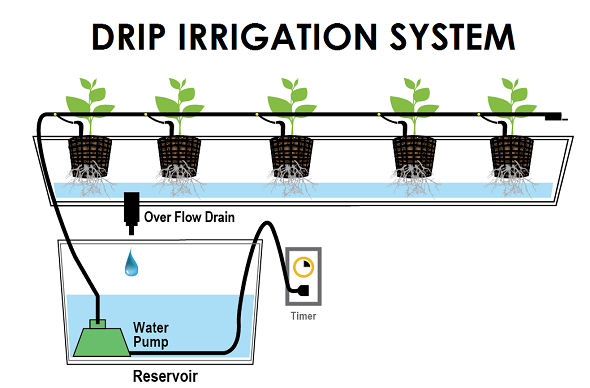
Pumpkin leaves are sensitive to disease if they are watered too often. When watering the plant, always water close to the ground.

They are shallow-rooted plants and require regular watering. Try not to put too much water on the leaves.

Fertilise the vine, maybe once or twice a month. Make sure you follow the instructions from the manufacturer of the fertiliser you use.

Everyone has their favourite brand of fertiliser they like to use, and sometimes it depends on where you live as to what fertiliser suits the environment.

Powdery mildew is a disease that loves pumpkin leaves, so treat it immediately with a fungicide that is safe for edible plants.

Wet soil will rot the fruit. Once the pumpkin begins to grow, place a piece of untreated board underneath it to prevent rot, setting in.

How long to they be ready

Pumpkins take from 14 to 20 weeks to maturity, depending on the type of pumpkin. When they are ready to harvest, the vine starts to wither.

Leave a reasonable length of stalk on the pumpkin when you pick it. Allow the pumpkin to sit in the sun for a day or so to harden before using.

Try companion plants with pumpkins

Try planting some companion plants:

  • Sunflowers
  • Borage
  • Lovage
  • Nasturtiums
  • Peas
  • Sweet Corn
  • Tansy
  • Lemon Balm near or with the pumpkins.

Watch out for natural pests

Be on the lookout for aphids, slugs, and Snails.

How to store grown pumpkins

Store your pumpkin in a well-ventilated area. Heat will cause the pumpkin to age and rot quickly.

Try these yummy recipes

Pumpkin Pie

Ingredients

  • 2 cups of cooked pumpkin mashed with 2 tablespoons butter and ½ teaspoon salt
  • ¾ cup castor sugar
  • ½ cup plain flour
  • 2 eggs
  • 2 teaspoons vanilla essence
  • 1 teaspoon cinnamon
  • ½ large tin of Carnation Milk

Method

  • Mix all the ingredients, except the pumpkin together. Add the pumpkin and mix well
  • Place mixture into a pie dish and bake in a moderate oven (180d) for 45-50 minutes.
  • When cooked and cooled, top with whipped cream that is sweetened with icing sugar. Sprinkle nutmeg on top.

Pumpkin Scones

Ingredients

  • 1 tablespoon butter
  • ½ cup sugar
  • 1 egg
  • 1 cup cold mashed pumpkin
  • 2 ¼ cups self-rising flour
  • ½ teaspoon salt

Method

  • Cream the butter and sugar together, add the egg, then the pumpkin.
  • Stir in the dry ingredients by hand. Turn out onto a floured board.
  • Press down lightly, cut into rounds.
  • Place on a heated tray and bake in an oven that has been heated to 225 – 250°

Pumpkin Soup

Ingredients

  • Preheat the oven to 180 degrees.
  • 1 medium butternut pumpkin cut into wedges. Remove the seeds, but keep the skin on
  • 1 sweet potato, peeled and cut into wedges

Method

  • Place on a baking tray and sprinkle with salt and pepper, and drizzle with 2 tablespoons oil.
  • Place in the oven and cook for 30 minutes or until soft.
  • While that is cooking, chop a large brown onion into small pieces.
  • Into the slow cooker, put 1 litre of chicken stock
  • 2 tablespoons of honey and the onion.
  • Remove the pumpkin and sweet potato from the oven. Remove the flesh from the pumpkin skin and add sweet potato and pumpkin flesh to the slow cooker.
  • Cook for 4 hours on low.
  • Blend mixture with a hand blender or food processor until smooth.
  • Serve with crusty bread and a dollop of sour cream. Sprinkle over finely chopped shallots.

That’s it, not only some great tips for the best place to grow pumpkins.  As well as three very tasty recipes you can also cook with what you grow.

Growing Fruit Trees in Your Back Yard

0
growing fruit trees in backyard

Why would you grow fruit trees in your back yard?

Well for a start, the fruit will feed your family. Growing your own will save you money. And home grown fruit is healthy and tastes so much nicer than shop bought fruit.

What will you plant?

It depends on what your family likes to eat. There would be no point in plant trees that aren’t going to be utilized.

There are a number of citrus trees that are able to be planted in a back yard. No fruit has impacted civilization as much as citrus.

We drink orange juice, whisky sour with lemon, lemonade, lemon meringue pie, duck a la orange, we season fish with lemon, we burn citronella candles to keep the mosquitoes at bay and so the list goes on.

fruit trees in your back yard


 Orange Trees:

Orange trees come in several varieties.

Washington naval is the most popular one that we see in supermarkets and fruit shops. They are a good eating orange, however the fruit will deteriorate quickly.

It is a hard tree to grow because they have a tendency to catch diseases easily. The naval tree doesn’t produce as much fruit as the Valencia

Valencia oranges are ideal for juicing. The fruit holds well on the trees for months. They have few seeds and the skin is quite thin.

They adapt well the different climate conditions and are high in sugar content.

There is the blood orange and the Seville variety.

Lemon Trees:

There are two Main types of lemon. The Lisbon and Meyer Lemon.

Lisbon is an Australian variety and is descendant from a Portuguese gallego lemon. Lisbon lemons were introduced in Australia as early as 1824 and were exported to the United States from there in 1874 and 1875.

The first reference to Lisbon lemons in the United States was in a Massachusetts gardening catalogue in 1843.. The Lisbon lemon is quite thorny and has many seeds.

The Meyer lemon, is a hybrid citrus fruit native to China It is a cross between a citron and a mandarin/pomelo hybrid distinct from the common or bitter oranges.

Mature trees are around 6 to 10 ft (2 to 3 m) tall with dark green shiny leaves.is the preferred choice of many households. The fruit is quite smooth.

It produces fruit foe most of the year and is the most cold tolerant of all the lemons.

Mandarine fruit trees

Mandarine Trees:

Once again there are several varieties of mandarine. The Emperor, the Imperial and the Honey Murcott

The Emperor has pale orange loose skin that is easy to peel.  It has great flavour and is especially sweet in the early part of the season.

The Imperial is another easy to peel fruit.

The Honey Murcott is not as easy to peel as other varieties as the skin is very thin. They are quite sweet and have few pips.

Most households grow these 3 fruit trees, however there are many others that might be just as popular in other back yards.

The orang, Lemon and Mandarine fruit trees also come in the dwarf variety which is an excellent idea for smaller backyards. They can also be planted in large pots.

Position.   Fruit trees should be planted where they are able to have sunshine for at least 6 hours a day to enable them to produce healthy sweet fruit.

 When you should fertilise fruit trees:

 You should fertilise fruit trees with a citrus fertiliser once every one or two months during the growing season and once every two to three months during the dormant season.

Drip liquid fertilizer about a foot away from the trunk. If using pellets spread them in a circle about a foot away around the trunk.

Watering:

 Citrus trees love water but only if it drains quickly. Infrequent deep watering is best. Water near the drip line and allow the water to soak into the soil.

A soaker hose is the best way to water as it allows the water to soak into the root of the tree. Let the soil dry out between watering so air can work into the soil and get to the roots.

watering fruit trees

Watering should occur about once a week, whether from rainfall or manually. The area should have excellent drainage so that you can soak the ground deeply with each watering.

Recipes for use when your fruit trees produce their yummy fruit.

Lemon Butter:

  • 6 eggs
  • 6 lemons
  • 1 lb sugar
  • 4 ounces butter

Juice the lemons and whisk together with the sugar and eggs.

Add the butter and heat in a double boiler until the mixture thickens like honey. Pour into sterilised containers. Store in the fridge.

Sweet Orange Marmalade:

  • 3 lb oranges
  • Juice of 2 lemons
  • 6 pints (15cups) water
  • 6 lb (12 cups) sugar

Scrub the oranges thoroughly in warm water. Cut them in half and squeeze out the juice. Remove the pips (seeds) induct off excess pith if it is very thick.

Tie the pips and pith loosely in a muslin bag. Cut the peel into thin matchstick strips.

Place the cut up peel, juice and muslin bag in a large bowl with the lemon juice and water. Leave to soak overnight.

Next day, place the contents in the cooking pot and bring to the boil. Simmer until the peel is tender, about an hour. Remove the muslin bag.

Add the sugar, bring to the boil again, stirring until the sugar is dissolved. Boil rapidly until setting point is reached.

Skim the scum off. Allow the marmalade to cool slightly, before pouring it into clean hot jars. Cover.

Note:  To test for setting point:

Spoon about one teaspoonful of the preserve onto a cold plate and put it aside in a cold place for a few minutes.

If the setting point has been reached, the surface will have set and will wrinkle when pushed gently with the finger.

Installing Drip Irrigation In Your Backyard

0
install drip irrigation

Keeping your garden watered effectively can be time consuming and a bit tough at times. So why not consider installing drip irrigation for your garden, in your backyard.

What is Drip Irrigation

Drip irrigation is a low-pressure and low-volume watering system. It keeps the roots moist but not soaked and uses less water.

Most drip systems are ½ inch hoses with tiny plastic nubs, called emitters which allow the water to drip out  at a regulated pace.

The tubing is snaked around the plants or in the case of rows of plants then it is layed alongside the row. This allows the water to get into the soil at the roots

Tubing can be purchased with the nubs already punched into it or you are able to purchase it un-perforated which allows you to fit the emitters where you actually need them.

installing drip irrigation

Un-perforated tubing can be used to customize a system for an unusual layout.

Attach a filter to the pressure regulator to prevent minute particles that may be in the water supply clogging up the system

Once you’ve layed out the tubing into the position use some ground stakes to hold it in place. Use Tee connectors and elbow joints if you need to change the direction of the tubing.

Sometime the plants are quite dense so the use of sprayers will benefit. Attach the sprayer to a stake and position it in the ground cover.

Make sure to check for leaks or connections that aren’t quite fitted correctly.

How effective is drip irrigation?

Drip irrigation allows the water to penetrate to the root zone where it is needed most. They are around 90% efficient compared to sprinklers which water around 65- 79% of the garden.

With drip irrigation you will require low pressure volume of water so a pressure regulator is needed to control the flow to your hoses.

The majority of hoses are rated to handle a certain level of pressure. So when purchasing the regulator make sure it matches the level of flow you want.

Each emitter should give you about a 30 minute run time before the water starts to run off.

Soaker hoses

Setting up this system requires hoses, stakes, riser drip tubes and sprayers. Most hardware stores and garden stores will be able to supply you with all the equipment that you will need.

What will you need?

Soaker hoses that will fit the length of garden you wish to water. If you have several garden beds, then you will require hose couplers, that is elbow and tee parts to connect your hoses and some end caps.

A filter that will connect to your outdoor spigot (faucet). Sometimes there are little bits of impurities in the water and having these filters will stop the hoses from clogging up.

It may be an idea to purchase an automatic timer for your system, this would save you having to remember to turn the irrigation on if you are busy.

How will a soaker hose benefit?

Soaker hoses are designed to work either on the soil surface or beneath mulch material. They can be buried to the depth of around 4 inches but this will make it harder to monitor it and may lead to damage from the roots from digging in the soil.

Alter laying the hoses, applying some organic mulch will help keep the hoses in place. If you have opted to lay them on the surface.

This has the added benefit of keeping the sun of the hoses which will help them last longer.

How much water will it use? Well it will depend on the pressure flow but usually around 30 gallons per hour for a 50 foot length.

The amount of time you will need to water  and how often will depend on the type o soil you have and the weather conditions in your area

It might be an idea to start with 30 minute time.  Then check the root zone to see how deep the water has seeped. Be careful not to disturb the roots.

Backyard Putting Green – Should You Add One to Your Backyard

0
backyard putting green

A backyard putting green is any golfer’s dream come true.  What better way to spend a relaxing evening than practicing your putt?

Now adding a putting green to your backyard is a decision for everyone.  If you are a diehard golfer but your partner isn’t.  Well that’s a decision you might want to consider.

What options do you have ?

There are some options available and many fantastic ideas for this backyard game. Adding this feature to your landscape is a great way to improve your outdoor space.

backyard putting green

Do it your self putting green

You may be tempted to take the do-it-yourself approach to this kind of project. This is fine, not the worst idea.  For some who have a lot of experience working with landscape design but most of us don’t fall into that category.

After all, if a backyard putting green were simple to install, we would all have one.

Of course, I don’t want to caution you to take on an expensive project when you can do some of the work yourself. However, I have seen many landscaping projects fall apart.

This can be very costly. Consulting a professional about your backyard putting green idea is the best approach to this venture.

Whats the Overall landscape design

The first thing you want to consider is your overall landscape design. If you have a lot of hills and bumps then you have your work cut out for you.

This is not to suggest that a backyard putting green is out of the question, though. You’re just going to have to move some earth to get things organized for the project.

Materials for a backyard putting green

Next come the materials used to get the job done. Are you interested in a grass backyard putting green that grows naturally?

Maybe you want an artificial turf. Do you want the backyard putting green to be used indoors as well as outside? You are going to use different materials for different greens.

I like to keep things simple. Instead of trying to work out my own design for by yard, I decided to go with a reputable company.

The company that I chose offered a synthetic backyard putting green that can be used indoors and outdoors. The sturdy material is ideal for both environments.

Real or fake it will improve your game

The company also implemented a design that is quite similar to a real golf course. I was amazed when I first stepped on my backyard putting green.

I felt as if I had just stepped onto the green in my favorite golfing site. Even though the material is synthetic, it feels just like real grass.

My putting green has helped me improve my game. I also love the idea of playing a little golf after a long day at the office.

This backyard feature is way more valuable than a pool or hot tub in my estimation.

Backyard Bird Feeders: How To Attract Hummingbirds To Your Backyard

0
Backyard bird feeders

Bird-watching is an enjoyable pastime for many people, with a many places offering birding tours.  Just imagine having that much enjoyment in your backyard.  Backyard bird feeders can help attract birds to your yard.

Why Have a Backyard Bird Feeder

Well as we said above it’s such a pleasurable past time.  Birds are fascinating creatures to watch.  Watching the antics of the different birds as they try to get the best and largest amount of food.

In this article, we’ll look at choosing a backyard bird feeder to attract hummingbirds.

Equipment you need for bird watching

Get yourself decent binoculars.  As the first glimpse at bird watching will come through the use of binoculars.

Binoculars are an essential piece of bird-watching equipment.  Even in your backyard, your binoculars must be able to keep the images stabilized.  You will find this necessary for long-distance bird watching.

You don’t have to spend hundreds of dollars on an expensive model.  It does pay to have a pair of binoculars that can stand up to being used in an outdoor environment.

Think about the weather that you’ll have to endure. They must be able to work in dim lighting and not fog up. As birds are not stationary creatures you should be able to focus on them quickly.

hummingbird bird feeders

Attracting a Hummingbird

The Hummingbird is a beautiful yet very agile bird. The chance to see them very closely in the wild is somewhat rare. This is because, like most wild animals, they are simply not comfortable around us humans.

One option to eliminate this problem is to provide a place for them to find supplementary food.

A popular way to attract hummingbirds to your garden is by using a backyard bird feeder.

You can fill the feeder with seeds or even nectar and there’s also the possibility of having a bird bath in your garden. This provides your visiting feathered friends the opportunity to splash about and get themselves nice and clean.

Where to go to buy a bird feeder

You can of course go to your nearest pet store and buy the latest and greatest in bird tables and backyard bird feeders, or you can simply try your hand at making your very own bird feeder.

This is a simple easy project to do and the satisfaction that you’ll gain as you look at the many birds will be worth your effort.

The main reason for buying a hummingbird feeder is to see these tiny birds in action.

Copper works best for attracting Hummingbirds

Decide what the Copper Hummingbird Feeder will look, like, and work best in your garden.

After all, what you want most is to attract these beautiful jewel-toned birds to your garden.

The decorative effect the Copper Hummingbird Feeder will have in your garden is just an added benefit.

Schrodt Facet Hummingbird Feeder

There is one particular hummingbird feeder that can catch the attention of busy little birds.

The copper base on this feeder is one of the main reasons for this. The Schrodt Facet Hummingbird Feeder is made entirely out of red-cut glass.

The shape of this bottle somewhat resembles a prism. The base of the bottle is narrow, but the bottle widens as you go upwards. This will allow you to store enough nectar to last for a few days.

The base of the feeder is made entirely of copper. This copper base reflects any light that is shining on it.

As the reflected light may bounce off the red glass bottle, curious hummingbirds will decide to come and investigate your garden that has a Schrodt Facet Copper Hummingbird Feeder in it.

And then enjoy all the beautiful birds in your garden.

Fresh Herbs and Home Gardening Tips

0
fresh herbs

Having fresh herbs at home is a serious home cook’s dream come true. However, having a full herb garden in the home might sound quite daunting.

Nevertheless, there are things the cook can do to make sure there are always fresh herbs in the house without having a garden growing in the living room.

Use The Window Sill

Nearly every kitchen has at least one window that houses a little cafe curtain and a small window sill.

Having small pots on the window sill is an easy way to ensure there are always fresh herbs on hand.

Growing green onions and flowering herbs like cilantro or parsley will work in the kitchen.

Pots that house these herbs can fit right on the window sill or on the counter. The herbs can be cut right from the plant when they are required.

This provides natural grooming for the shrubs so that  they will not overgrow and start to wilt.

growing fresh herbs

Decorate The House

Some flowering herbs are perfect for decorations in the home because they smell really nice.

Depending on the herb, anyone can use a plant to adorn a certain room and let the scent waft through the air to give a pleasing aroma to the whole room.

Rosemary works well for a study, library, or office because of its strong aroma. Lemon cilantro has a sweet aroma that would be lovely for a sitting room, sewing room, or den.

Parsley and oregano are perfect for the living room, and the grassy herbs like sage are great for the bedroom.

Each herb has a place in the house that will allow the plant to appear as a decoration and not as a strange pot that is out of place.

Use The Deck, Too

The deck or patio of a home is a perfect place to shelf garden the herbs that are needed in the kitchen.

A latticed shelf or extra table can hold all of the pots for the herbs and keep them all together on the patio or deck.

This form of outdoor gardening is easy because it doesn’t require the homeowner to dig in the ground.

Plus, gardening in this style allows the herbs to be bought indoors when the weather gets cold. Heavy rains, cold air, and wintry temperatures can kill many herbs, and being able to bring those herbs inside helps to save them.

The serious home cook will then have fresh herbs at their disposal all year round.

Herb gardening in the home is an excellent way for the family wishing to save money on their grocery budget,

Have fresh ingredients for their food, and ensure that they have a ready supply of precisely what they want.

The process of herb gardening at home can start on the windowsill, move throughout the home as decoration, or even make its way onto the deck for the summer before being brought in when the cold winds blow in.

Fresh herbs will always be ready for everyone’s favorite dishes when the family gardens their herbs in the home.

Why Use Landscaping Stones?

0
landscaping stones

You should incorporate landscaping stones into your landscaping design for many reasons. The main one however is for beauty, pure esthetic beauty.

For a landscaping design to look perfect, it needs to have layers; this can be hard to achieve without adding some stones.

Adding landscaping stones

Why you should add Landscaping stones

Stones are not the only way to give your yard depth but they are the easiest way.

You could try to change the slope of your yard.

You could dig lower spots and build up higher ones but this could take forever and you would have to know a lot about landscaping to try to tackle a job like that.

Just think of the trouble you could get into with the drainage issues if you were to make a mistake!

No, it is far easier to simply use stones to bring some depth to your yard when you are landscaping.

Raising your landscaping profile with stones

You can use stones to accent certain portions of your yard, you can even plant some plants in these landscaping stones.

They look great around the patio and the fence and you can even get colored landscaping stones to bring more color into your yard.

This kind of color is especially nice to have in winter when everything is so bare and cold-looking.

The fact of the matter is that you can transform the whole look of your yard with the simple use of stones. They are like jewelry only for the yard.

Different types of stones

There are many different kinds of stones when you are landscaping.  They come in all shapes and sizes.

The types of stones that are right for you will depend on the effect that you are trying to create in your yard. And different parts of the yard might require different-sized stones to be used.

You can get a wide variety of stone colors for your landscaping idea stones.  You may want to mix a couple of colors to create a whole new and interesting look.

If you are planning to overhaul your yard this year.  Then you need to start looking into using stones in your landscaping design.

These will bring the whole yard together and if they are used right will add balance and harmony to your entire garden.

You can get stones at your local gardening center and even some home-building stores will carry them.

Shop around and find the landscaping stones that suit your home and your needs best before you make a purchase.

Why You Really Need a Backyard Fire Pit.

0

Man’s fascination with fire seems to date back to the caveman days.  We cook with it, we use it to keep warm.  Fire is the one thing that man loves.  So why not add a backyard fire pit to your backyard?

There are several things that you need to know before you start digging up your backyard and setting it on fire.

backyard fire pit

Pick your location

Ok, great you’ve decided to add a fire pit to your backyard.  You need to pick the best location.    You need it far away enough from your back door.  To make sure the wind isn’t going to blow a lot of smoke back through your house.

Far enough away from trees or shrubs, you might have.  Just so you don’t set anything else on fire by mistake.

Make sure you are far enough away from everything.  So your smoke goes straight up and away from your house.

Setting up  your backyard fire pit

Once you’ve got the location picked, think about what type of put you want.  You can dig a hole yourself and make your pit.

Try to line it with cement or bricks, or visit your local outdoor specialist or hardware, and look to purchase a premade one.

Entertaining around your fire pit

You’ve gone to the trouble of adding a backyard firepit, you’ve asked your friends around. So do you all just stand around, of course not.

Make sure you’ve got some chairs or seats that you can use and leave outside.

If you’re adventurous and a little handy, you can make your own.  Pick a nice hearty timber and knock up some outdoor benches, you can even cement them in.

Enjoying your backyard fire it is all about a little fun, so with your friend or family you can try roasting mushrooms, and cooking potatoes in the jacket wrapped up in a little foil.

Maintenance of your backyard firepit is important, make sure you’ve got a cover for it, so if it rains it won’t fill up.  Also when you are cleaning out your ash, it goes great in your backyard gardens.

Apart from that just enjoy your backyard fire pit, it’s there for you and those cold nights outside.

Backyard Hot Tubs – Adding One to Your Backyard

0
backyard hot tubs

A nice winter evening, a bottle or two of Cabernet  Sauvignon, a little giggle from your partner, a plate of nice cheeses, the mist rising of the water. Paints a nice picture doesn’t it?  That’s what you can have with backyard hot tubs.

The whole idea of Living Out the back is to be able to enjoy your backyard living space year-round.

Now we think it’s stupid to only be able to enjoy in summer, it’s winter that’s the challenge. The challenge is met by adding backyard hot tubs to your outside area.

backyard hot tubs

Something that you need to think about if you want to add a backyard hot tub :

Portable

This means that you can move it around, and take it with you when you want.

The great thing about portable Hot Tubs is, that if you’re thinking of adding one to your backyard and are still a little unsure, you can rent one.

Try it, then have it taken away when you’re satisfied.

Permanent

This means that you’re adding it to part of your backyard landscape.  Usually, you would build something around it,  either gardens or platforms.  Something that suits the environment around it.

What size

Are you someone who entertains a lot, or is it just family, and a few friends, you can get hot tubs that suit 2 people to 8 or more.

Of course, you need to think about what sort of budget you have to spend as well,

What area do you have?

How big is your backyard, is it large, and can fit an 8-seat Hot Tub, or do you only have a small courtyard that will fit a small 2-seat backyard hot tub?

Number of jets

Believe it or not, this is important, the number of jets in the hot tub, and the position for them.

It’s not just about some pleasure,, having your backyard hot tub, can be good for rehabilitation.  If you’ve got an injury.

Maintenance

You will spend some money on your hot tub, over time, you need to make sure that the water levels are safe, as well as potentially needing to service the motor from time to time.

How much to spend

Backyard hot tubs can be lots of fun, but they are an expensive ticket item, so make sure you know how much money you have to spend before you start looking.

If you’re on a budget maybe a secondhand hot tub is the right choice for you.

There is no doubt that backyard hot tubs can be lots of fun, and bring countless hours of fun and pleasure, just make sure you have what you want.

Concrete Landscaping Can Add So Much To Your Backyard

0
concrete landscaping ideas

We all know what a concrete jungle is.  To hear the word concrete you may not think that it would be something to want in your yard but in fact, concrete landscaping has come a long way in the last 10 years or so.

Now landscaping with concete is all the rage and it is very pretty too.

Concrete landscaping in your backyard

You can use concrete landscaping for many different parts of your backyard. Most people use concrete landscaping ideas and designs for the walkways and paths that wind through their gardens.

This is more for those with larger yards but even if your yard is small it could do with some concrete landscaping.

You could put down a lively patio that you and your friends could it at to have drinks or tea. There is nothing more fun than a little party out on the patio on a nice day.

Concrete landscaping

Stone walls and concrete

Concrete Stone walls are another form of landscaping that has caught on like wildfire. Walls are what will frame the whole home.

They are the gorgeous and steely frame to the glorious painting that is your front and back yard. There are many other reasons to have landscaping such as concrete walls as well. These walls are perfect for keeping your pet in the yard.

If you have a dog that is prone to run away then look into this kind of landscaping idea. These walls are also very good for keeping intruders out.

The harder your home is to get into the less likely burglars will be to bother trying. So look into this type of concrete landscaping today and talk to a professional about it.

Landscaping and soil retention

You can also use landscaping with concrete to keep your soil in place. If there is a part of your yard that is prone to slipping then you can build a retention wall expressly for this purpose.

The best thing about landscaping with concete is that while it can be functional you can make it look as if it is just there for looks.

There is so much that you can do with landscaping because concrete is so easy to work with. You can use concrete bricks or you can use whole solid slabs with concrete.

You can even get custom-made landscaping stones that are in unique and creative shapes and patterns.

Take some time and see what all is out there in terms of concrete landscaping, you might just be surprised.